Tea is not just a drink; it is a sensory experience that can be captured through photography.
You may have the best product, but if the images you use to showcase it do not convey quality, it will be difficult to connect with your customers.
For online or physical shop owners, and for those looking to stand out on social media, visual presentation is key: it can make the difference between a quick glance and a confirmed sale.
In this article, you will find a practical and comprehensive guide with tips on how to photograph your teas and infusions in a way that makes them irresistible, awakening in each image the desire to enjoy the magic of tea.
What should your tea photography look like?
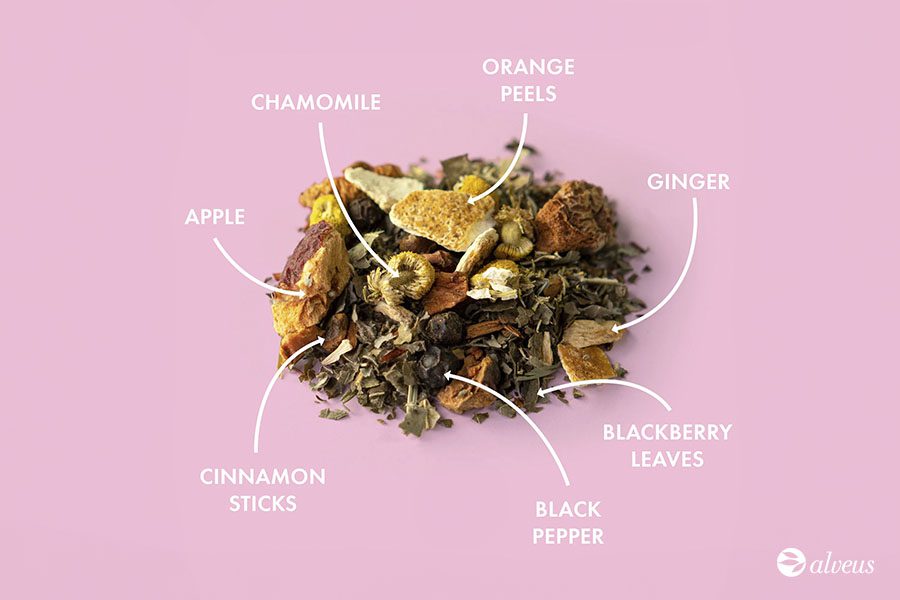
For your customers to get a clear idea of what your tea is like, it’s best to start with a photograph on a white background. This type of image highlights the details and removes distractions, allowing the ingredients of blends to be clearly appreciated, or the shape and rolling of the leaves in pure teas.
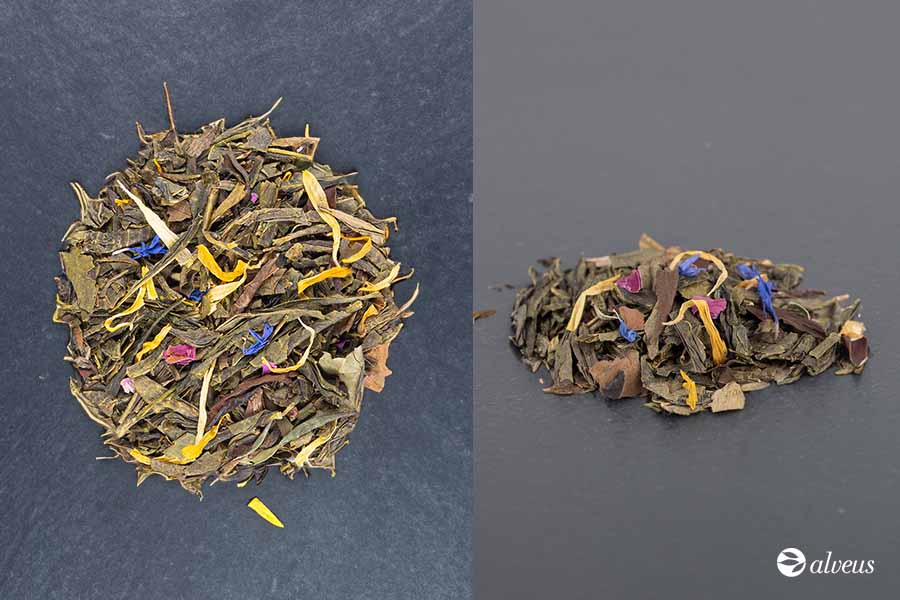
Take several shots, from above and from the front, showing the tea in a small pile. In the case of blends, make sure that all the ingredients are visible in the image.
Remove any imperfections the selected sample may have:
- twigs,
- discoloured leaves,
- broken leaves,
- ingredients not shown whole…
You can also add images of the infused tea, so that your customers can see what the liquor looks like. For this, use a cup or bowl with a white base and take the shot from above.
Finally, you can include a composition of the tea scattered on the table, alongside a teapot, cups, or any other related accessory.
Basic equipment for photographing teas
You don’t need to invest in the most expensive gear to get started, but you do need some essential elements. Below, we share what they are and what to keep in mind when using them.
Camera
Today, many smartphones come with excellent quality cameras. On the other hand, a DSLR or mirrorless camera will give you greater control over exposure, focus, and sharpness.
Lenses
A macro lens is perfect for capturing the fine details of tea leaves, while a 50 mm lens allows you to achieve an attractive depth of field in general shots.
Tripod
A tripod is essential to keep the camera stable and avoid blurry shots, especially with long exposures. Some models even include built-in lighting, such as ring lights, which are widely used in content creation for social media.
Lighting
Natural light is your best ally: place your scene near a window to take advantage of soft, diffused brightness. If you want more control, use reflectors and diffusers to soften shadows and reduce glare.
Preparing the scene
With your equipment ready, it’s time to organise the space where you’ll take the photos. For teas, it’s best to use white or neutral backgrounds, so the product is always the star.
To achieve maximum consistency in your images, keep these tips in mind:
- Use two cameras (or two fixed angles): one for front shots and another for top-down views. This way, you’ll gain agility and consistency in your session.
- Mark the exact spot where you’ll place the tea: this ensures that all photos have the same proportion and framing.
- Use a uniform bowl: keeping the same shape and diameter for all teas makes comparison easier and enhances their presentation.
- Take all your photos in a single session (and edit them together if possible): this will help you maintain consistent lighting and style.
Creating a Moodboard
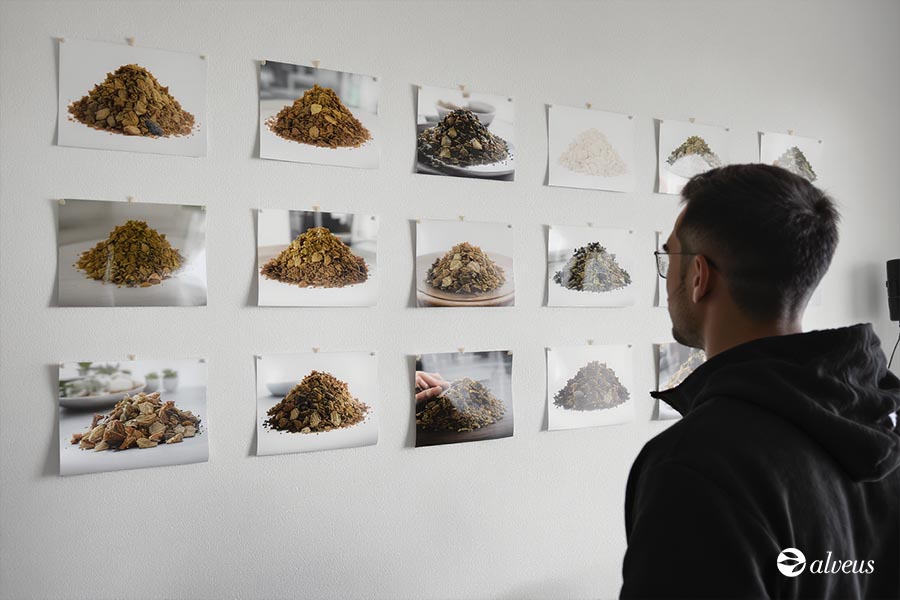
Before starting a photo session, create a moodboard with examples of images that inspire you. This will help you maintain a consistent vision and communicate your personal style.
Maintain a consistent photographic style that reflects your brand identity. To do this, use specific colour palettes, types of lighting, and scene composition.
Editing photographs of your teas and infusions
After capturing all your images, the next key step is editing. This is the stage where you can correct small mistakes and enhance the beauty of each photo.
We recommend tools such as Adobe Lightroom or Photoshop, which allow you to adjust basic parameters like exposure, contrast, and saturation. Pay special attention to colours: make sure they look true to the product while remaining attractive. A good adjustment of colour temperature will make the tea appear natural and appealing.
Nowadays, you also have the support of AI editing tools, which can save you time and simplify processes. Some allow you to remove unwanted objects, automatically improve lighting, or even generate background variations without losing a natural look.
Finally, crop your images to remove distractions and refine composition. Sometimes, just a few extra minutes of editing —whether manual or AI-assisted— are the key to turning a good photo into an irresistible image.